In this short note I will summarize how I can happily use Visual Studio Code on my local Windows desktop or laptop to do remote development on a Raspberry Pi or another Linux machine, and even push Arduino sketches from the Raspberry to an Arduino without touching the Arduino IDE. I have been a fan of the Raspberry Pi single board computer for a number of years now, and have used quite a number of them in my desktop single board computer cluster and my developing Raspberry/Arduino robot car. Still, I found developing code on it to be uncomfortable and sometimes cumbersome, as some IDEs don't support ARM processors whereas others like Thonny are rather basic. Remote development solves this by allowing you to code on your desktop / laptop and run it externally on a host (like the RPi). With the nascent Arduino CLI you can even largely replace the Arduino IDE for developing Arduino sketches on RPi and pushing them to a connected Arduino.
Remote Development with Visual Studio Code
For remote development to work in VS Code, you need to be able to SSH into your Raspberry, or other remote machine, using ssh pi@IP_ADDRESS in a command prompt (Windows) / terminal (Linux). You also need to install the VS Code Remote - SSH extension. Once done there's a new symbol in the left toolbar and an indicator on the bottom-left corner of the Status bar. This indicator tells you in which context VS Code is running (local or remote). Click on the indicator to bring up a list of Remote extension commands.

You can enter a new SSH connection or choose among previously used ones that are stored in a configuration file. More details can be found in Microsoft tutorial pages here and here. Upon connection to a new system VS Code will provision the VS Code Server to the remote environement. This will work with a number of Linux flavors, but certain other extensions may not work on ARMv7l (AArch32) and ARMv8l (AArch64) devices if they use x86 native code in the extension. The installation on my Raspberry looked as follows:
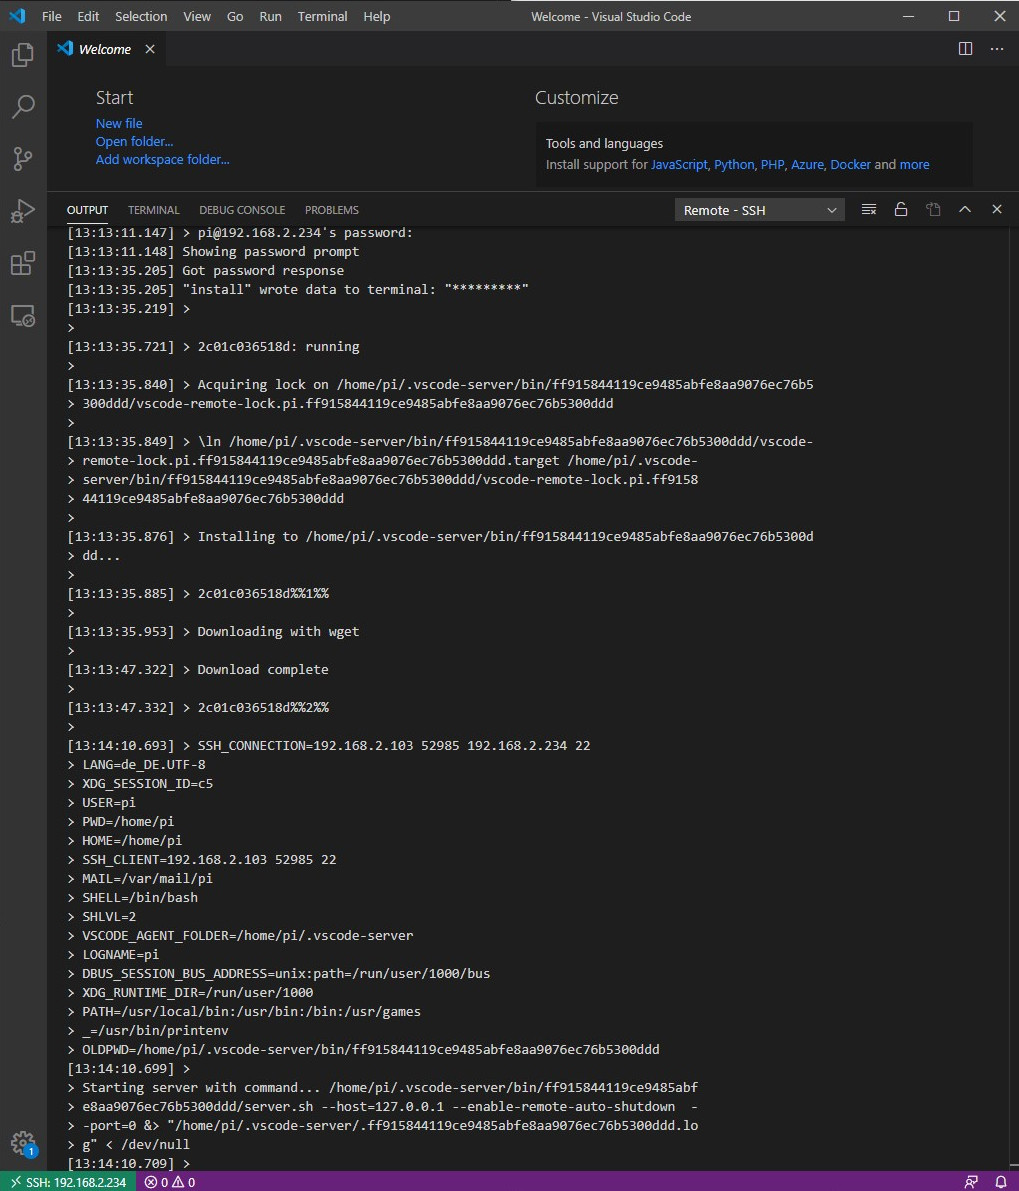
That's basically it, from here on everything works fine, even on my old Raspberry Pi 2 Model B. Regarding supported / unsupported extensions I will need more time to explore and will eventually add to this post later on.
Arduino CLI
The Arduino IDE is great at achieving its intended purpose: It's a simple, single-file application development environment. It has just enough integrated tools to help achieve that purpose. But for larger application development it doesn't compare with a full-featured C/C++ IDE, lacking features such as code navigation, auto-completion, version control integration, or an integrated terminal.
Thanks to the nascent Arduino CLI there is now a potentially much more efficient mode of coding for the Arduino. Arduino CLI is the "glue" that can pair the VS Code IDE with common Arduino compilation and upload tools, providing a command-line interface for such tasks as building Arduino sketches, uploading Arduino sketches, downloading libraries and downloading new board definition files - all without ever opening the Arduino IDE.
The latest version of the Arduino CLI on any supported platform can be obtained using the install.sh script:
$ curl -fsSL https://raw.githubusercontent.com/arduino/arduino-cli/master/install.sh | shNext, I created a configuration file as suggested on the Arduino CLI man page, in order to avoid a lot of typing when issuing a command:
$ arduino-cli config initThe next thing to do upon a fresh install is to update the local cache of available platforms and libraries by running:
$ arduino-cli core update-index
Updating index: package_index.json downloaded
Arduino and Raspberry are connected via USB cable on my mobile robot, so let's see whether the Arduino can be recognized:
$ arduino-cli board list
Port         Type              Board Name   FQBN            Core
/dev/ttyACM0 Serial Port (USB) Arduino Uno  arduino:avr:uno arduino:avr
/dev/ttyACM0 Serial Port       Unknown
The Arduino Uno was recognized and from the output of the command we see the platform core called arduino:avr is the one that needs to be installed to make it work. The fact that we see an Unknown board listed doesn't really matter as long as we identify the platform core and use the correct FQBN string.
You can search for available cores like this:
$ arduino-cli core search arduino
ID                Version Name
Intel:arc32       2.0.4   Intel Curie Boards
arduino:avr       1.8.2   Arduino AVR Boards
arduino:mbed      1.1.4   Arduino nRF528x Boards (Mbed OS)
arduino:megaavr   1.8.6   Arduino megaAVR Boards
arduino:nrf52     1.0.2   Arduino nRF52 Boards
arduino:sam       1.6.12  Arduino SAM Boards (32-bits ARM Cortex-M3)
arduino:samd      1.8.6   Arduino SAMD Boards (32-bits ARM Cortex-M0+)
arduino:samd_beta 1.6.25  Arduino SAMD Beta Boards (32-bits ARM Cortex-M0+)
littleBits:avr    1.0.0   littleBits Arduino AVR Modules
Let's install the arduino:avr platform core:
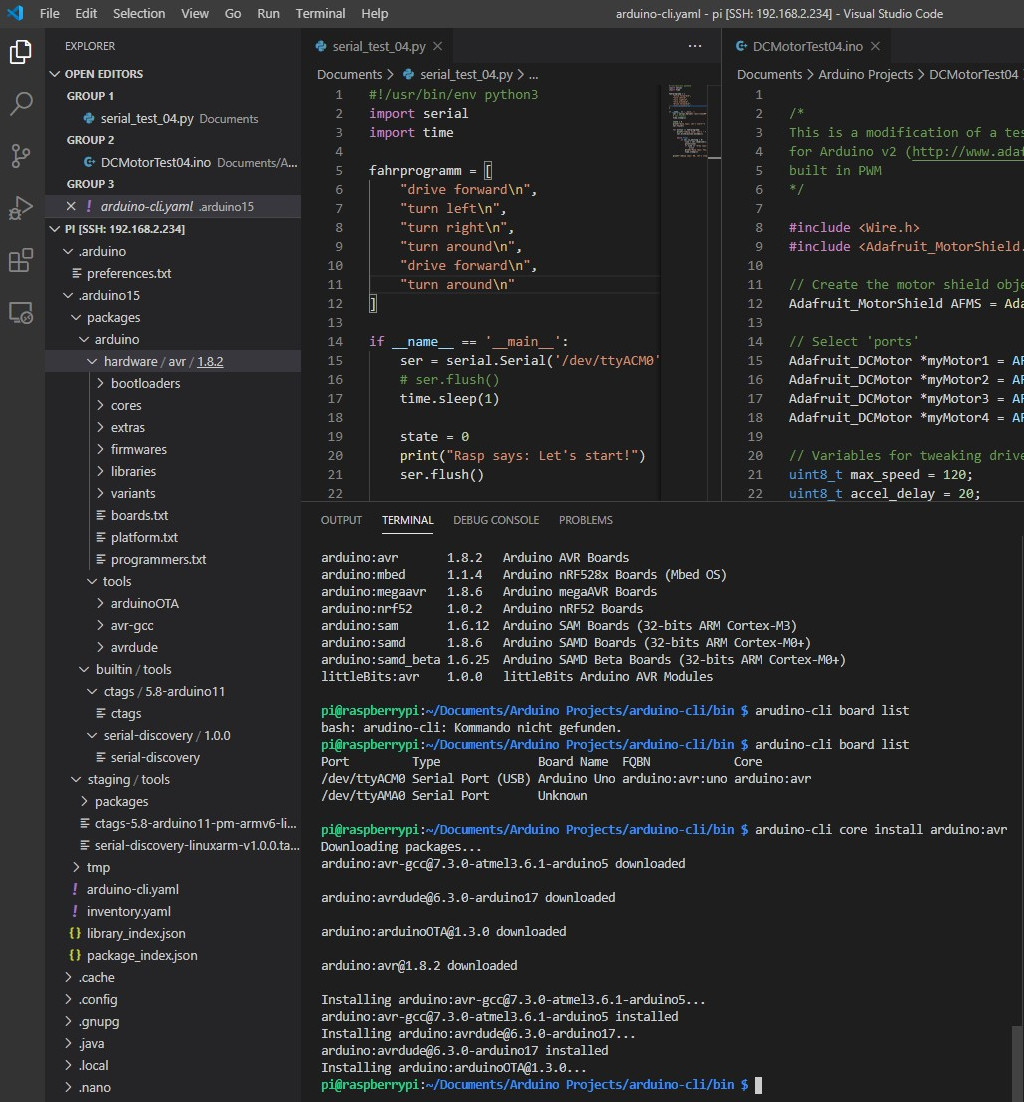
$ arduino-cli core install arduino:avrThe process is also documented in the following picture which, on the left hand side, shows the folder structure that has been built during the installation process:
From a hardware perspective we are good to go but we may need to import external libraries before we can compile an Arduino sketch. In my case I needed a library for the Adafruit Motor shield. You can search for libraries like this:
arduino-cli lib search adafruit motor shieldThis will result in a list of related libaries out of which you can then install the right one:
arduino-cli lib install "Adafruit Motor Shield V2 Library"We are now good to go. Arduino sketches can be developed in VS Code and then compiled and uploaded from the integrated terminal. To make the last two steps handier and avoid typing long commands I added a few lines to the .bashrc shell script, using
$ nano ~/.bashrcFirst I added the directory of the arduino-cli executable to the user $PATH variable so that I can execute the Arduino CLI without typing the full path:
export PATH="/home/pi/Documents/Arduino Projects/arduino-cli/bin:$PATH"This is necessary since I didn't store arduino-cli in one of the standard directories for files with executable permissions, such as /bin, /sbin, /usr/sbin, /usr/local/bin or /usr/local/sbin. As a second addition, I create aliases acompile and aupload as follows:
alias acompile="arduino-cli compile --fqbn arduino:avr:uno"
alias aupload="arduino-cli upload -p /dev/ttyACM0 --fqbn arduino:avr:uno"
They allow me to compile Arduino sketches and upload them to the board using the following short commands:
acompile DCMotorTest/ && aupload DCMotorTest/Note that you need to give the directories as arguments, not, e.g., the .ino file for compilation. After saving the .bashrc file I loaded the changes into the current shell session using the source command:
$ source ~/.bashrcTo confirm that the directory was successfully added, one can print the value of $PATH by typing:
$ echo $PATHThe final picture shows the result of our work. We can now develop Python code for the Raspberry and C++/.ino code for the Arduino side by side. Also we can use several parallel terminal windows to upload sketches and monitor code execution:

Links
Finally, some links that I found helpful:
- Visual Studio Code remote development using SSH is well-documented here and here.
- The Arduino CLI is relatively well documented on their GitHub page. Additional websites that may be helpful: One, two, three.